6 Fire Pit Designs to Extend Your Outdoor Season

As much as we enjoy the family-friendly events of summer, like Lavender Fest here in Menomonee Falls, the hot, sticky weather can leave us dreaming of crisp evenings and cooler days ahead.

Soon enough, the humidity will give way to that first refreshing breeze of autumn. Picture yourself on the patio, enjoying the fading light as the air finally cools, and imagining how to make nights like this last longer.

That’s where a cozy fire pit comes in. With the soft crackle of flames and the warm glow casting light across the yard, it transforms a simple evening into something memorable.

Whether you prefer the ease of a portable setup or the beauty of a custom-built feature, the right fire pit makes your backyard the place everyone wants to gather, long after the summer heat has passed.
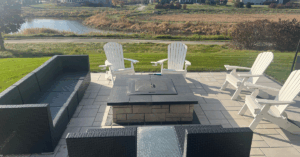
Covered Fire Pit

Why Add a Fire Pit to Your Outdoor Living Space?

Aesthetics aside, a fire pit has a way of drawing people in.

It naturally becomes the place where conversations linger, where friends gather a little closer, and where you can unwind after a long day. Beyond the atmosphere it creates, a well-planned fire pit adds function and value to your property.

A well-planned fire pit can anchor your backyard design, define a seating area, and make your outdoor space usable well into the cooler months.

When integrated thoughtfully into your overall landscape, it’s more than just an accessory — it’s an investment in both the beauty and the livability of your home.

Integrate Fire Pits into Your Hardscape Design-Build Plan

The best fire pit designs are those that feel like they belong, seamlessly integrated into your outdoor living space rather than added as an afterthought.

Planning your fire pit as part of a complete hardscape design-build project ensures it blends seamlessly with patios, seating walls, or even built-in fireplaces for a cohesive, upscale appearance.

Choosing materials like pavers, natural stone, and accent lighting ensures that your built-in fire pit not only complements your home’s style but also withstands Wisconsin’s changing seasons.

With a design-build approach, every detail from size and placement to finish and features is tailored to your lifestyle, so your fire feature feels like it has always been part of the plan.

6 Fire Pit Designs That Turn Up the Heat on Outdoor Living

There’s a wide range of fire pit designs that can enhance your outdoor living space. The best choice comes down to your style, space, and how you plan to use it.

Here are six options that combine warmth, function, and lasting appeal.

1. Built-In Stone Fire Pits

A built-in fire pit made from natural stone offers a timeless look that blends beautifully with any outdoor living space. This style is perfect for homeowners who want a permanent feature that integrates seamlessly with patios, seating walls, or other hardscape design-build elements.

Stone is both durable and weather-resistant, making it ideal for Wisconsin’s year-round conditions. With endless options for shape, size, and stone type, you can create a custom look that complements your home’s architecture while providing a reliable gathering place season after season.

Stone Fire Pit

2. Gas Fire Pits

For homeowners who want warmth without the upkeep, a gas built-in fire pit offers instant ambiance at the flip of a switch. This clean, modern option is perfect for low-maintenance outdoor living, eliminating the need to store wood or manage ashes.

Gas fire pits can be incorporated into columns, walls, or custom tables as part of a hardscape design-build project, giving you flexibility in both form and function. They’re also an excellent choice for consistent heat output and ease of use, making them a practical yet stylish addition to your backyard.
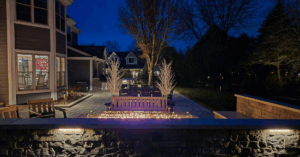
Gas Fire Pit

3. Fire Pit Tables

A fire pit table combines the warmth of a flame with the practicality of a surface for drinks or dining. This versatile option works exceptionally well in smaller patios where a larger built-in feature might feel overwhelming.

Available in both portable and built-in styles, fire pit tables can be tailored to match surrounding materials and finishes, ensuring they fit seamlessly with your space.

They add function without sacrificing style, making them a smart solution for outdoor areas that need to work hard in every season.

4. Sunken Fire Pits

A sunken fire pit creates an inviting, enclosed gathering area that feels cozy and protected. Lowering the seating area below ground level provides natural wind protection while adding a dramatic focal point to your backyard.

This style pairs beautifully with built-in seating walls or retaining features and works best as part of a larger landscape redesign. While it requires more planning and excavation than other styles, the end result is a unique, intimate space that draws people in and encourages lingering.

5. Fire Bowls & Portable Options

Fire bowls and other portable styles offer flexibility for those who want warmth and ambiance without committing to a permanent structure. They’re ideal for renters, smaller spaces, or anyone looking for a quick seasonal upgrade.

Many models are gas-powered or self-contained, making them easy to move, store, or reposition as your needs change.

With options ranging from sleek modern designs to rustic finishes, portable fire features can fit seamlessly into any outdoor setup.

6. Smokeless Inserts

Smokeless inserts are a smart upgrade for both new and existing fire pits, offering the warmth of a wood-burning fire without the heavy smoke.

Designed to improve airflow and burn efficiency, they create a more comfortable experience for guests and reduce lingering odors.

These inserts work with both wood and gas systems, making them a versatile choice for many backyard setups. As more homeowners look for clean-burning, low-maintenance solutions, smokeless designs are quickly becoming one of the most popular fire pit features.

Safety and Placement Tips

A fire pit can be a beautiful addition to your yard, but it needs to be installed and used with safety in mind. Keep these guidelines in mind:

  • Maintain distance from your home, fences, trees, and other flammable structures.
  • Consider wind direction when choosing the location to keep smoke away from seating areas.
  • Plan seating thoughtfully so guests can enjoy the warmth without sitting too close to the flames.
  • Follow local codes and permitting requirements before beginning any installation.
  • Hire a professional installer to ensure your fire pit is safe, durable, and built to last.

American Landscape Builds Fire Pits Tailored to Your Outdoor Living Needs

The right fire pit can extend your outdoor season, create a natural gathering spot, and enhance the overall appeal of your landscape. Our team designs and builds custom features that match your style, fit your space, and stand up to Wisconsin’s weather.

Are you considering adding a fire pit to your outdoor living space? Let American Landscape help you create a feature that brings warmth, style, and value to your home.

Contact our team today to get started.

Tips to Keep Your Landscape Thriving in August

ConeflowerFlower Care

  • Fertilize container plantings.
  • Deadhead flowers to encourage additional blooming.
  • Monitor for disease and insect problems and treat as needed.
  • Remove any slug-eaten leaves from hostas.
  • Cut back daylilies to 3-4″ to stimulate regrowth.
  • Check rhizomes for iris borer caterpillars.
  • Do not fertilize shrubs or roses after mid-August to discourage tender new growth before winter.

Pro Advice: Clear leaf debris from gardens to prevent breeding grounds for insects and fungal diseases!

Lawn mowing and trimmingLawn Maintenance

  • Mow as necessary. Raise mowing height to at least 3” as temperatures exceed 85˚F.
  • Water lawn adequately to keep it from going dormant. Deep (1” per week) and infrequent is preferred over frequent shallow waterings.
  • Scout for grubs. Peel back sod. More than 8 grubs per square foot can cause wilt or death of turf.
  • Establish or renovate turf by seed (late summer – early fall, depending on weather conditions). Prepare soil properly and get good seed to soil contact.

Tree Care by American Landscape Arborists

Trees & Shrub Care

  • Water newly planted trees and shrubs. Soak each plant well with the hose; sprinklers do not provide adequate water to encourage deep root growth.
  • Scout for fall webworm nest building near ends of branches.
  • Review health of trees and consider fall root feeding if necessary.

Tip! Don’t let weeds go to seed. “A year of seeding equals 7 years weeding.”

If keeping up with your landscaping chores feels overwhelming, reach out to learn more about our maintenance programs. (262) 252-4260

Raised Garden Beds vs. In-Ground Planting: Which Works Best for Your Space?

Each year, as Elm Grove prepares for its Fourth of July fireworks, cars wind through quiet neighborhoods on the way to the park. Along the route, something else stands out — the gardens. By early summer, they seem to have transformed overnight.

What was bare soil in May is now full of color and texture: tomato vines climbing trellises, herbs nestled in raised beds, and wildflowers softening backyard fences. Every yard offers its own version of what it means to grow something well.

Some homeowners prefer the structure and simplicity of raised beds. Others work directly with the land, planting into the soil that’s been there for generations. Across southeastern Wisconsin, both methods have earned a place in local landscapes for good reason.

If you’re planning a new garden or expanding what you already have, your layout matters. It influences how your garden functions, what you can grow, and how much you’ll enjoy spending time in it.

What’s the Difference Between Raised Garden Beds and In-Ground Planting?

When planning a garden, one of the first decisions to make is how you’ll grow your plants. Two of the most popular methods are raised garden beds and in-ground planting. Each offers unique benefits and challenges, and the right choice depends on your space, goals, and soil conditions.

Let’s take a closer look at how each method works.

Raised Garden Beds Explained

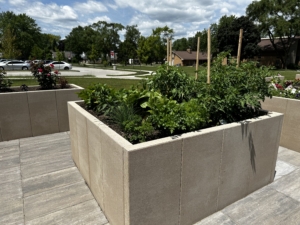
Raised garden beds are freestanding structures built above ground level. Gardeners typically fill them with high-quality soil blends that match their planting needs.

These beds are often built with:

  • Natural wood (such as cedar or redwood): Naturally rot-resistant and affordable, making it a popular DIY option.
  • Galvanized metal panels: Extremely durable and long lasting, with a modern look that resists rot and pests
  • Recycled composite boards: Made from recycled materials and designed to resist warping, cracking, and rot over time.
  • Stone or masonry edging: Heavy-duty and permanent, offering a classic look and excellent insulation for soil.

Raised beds give you more control over:

  • Soil composition and drainage
  • Weed management
  • Garden layout and spacing

They also improve accessibility, especially for gardeners who prefer not to kneel or bend. Because the soil sits above ground, it warms up faster in spring and dries out more quickly after rain. That makes it easier to manage planting schedules and moisture levels. This method is suitable for gardens with poor or compacted native soil. It also suits small yards, patios, or any space where a tidy, organized layout is preferred.

In-Ground Planting Explained

In-ground planting involves growing directly in the earth without raised borders or imported soil. This traditional method uses the existing soil on your property and typically begins with soil testing and preparation.

Raised vs Inground gardensGround preparation begins with:

  • Tilling to break up compacted soil
  • Adding compost or organic matter to improve texture and fertility
  • Adjusting pH or nutrients based on soil test results

This method supports deep-rooted plants, allowing your garden to follow the natural contours of the landscape. It also works well for large garden beds where raised structures may not be practical.

In-ground planting is a good choice if you:

  • Have access to healthy native soil or are willing to amend it
  • Want to grow crops that require more root depth or horizontal space
  • Prefer a natural look that blends into the surrounding landscape
  • Are planning a larger garden that would be costly to build as raised beds

Although it may involve more physical labor at the start, in-ground planting offers long-term flexibility and room to scale. It remains one of the most cost-effective and traditional approaches to gardening, especially for expansive spaces.

Pros and Cons of Raised Garden Beds

Raised beds support intensive planting styles, such as square-foot gardening, making them ideal for maximizing yields in small spaces.

Loose, well-drained soil allows crops to grow closer together without competing for nutrients.

They also help with pest and disease control. The defined structure contains soil more effectively and makes it easier to install protective barriers, such as mesh or row covers.

On the downside, raised beds come with higher upfront costs due to the materials and construction required. They’re also harder to expand or move once installed.

In hot, dry weather, raised beds may require more frequent watering since they can lose moisture from all sides.

Pros and Cons of In-Ground Gardening

In-ground gardens offer long-term flexibility with minimal structural upkeep. There’s no need to maintain frames, and you can expand planting areas as your garden grows.

This method also supports a healthy ecosystem. Native microbes, earthworms, and beneficial fungi thrive in undisturbed soil, helping to improve long-term soil health and biodiversity.

However, in-ground beds can suffer from compaction, especially in clay-heavy soils or high-traffic areas. Poor drainage may lead to stunted growth or root issues if the soil isn’t well-maintained.

Weed control is also more demanding. Even with mulching and regular care, native soil tends to produce more persistent weed growth than contained raised beds.

Best Plants for Raised Beds and In-Ground Gardens

Wisconsin’s short growing season, cool spring temperatures, and varied soil conditions make it especially important to choose the right plants for your garden type.

Some crops grow best in the controlled soil of raised beds, while others thrive in the open layout of an in-ground plot.

Best Plants for Raised Beds

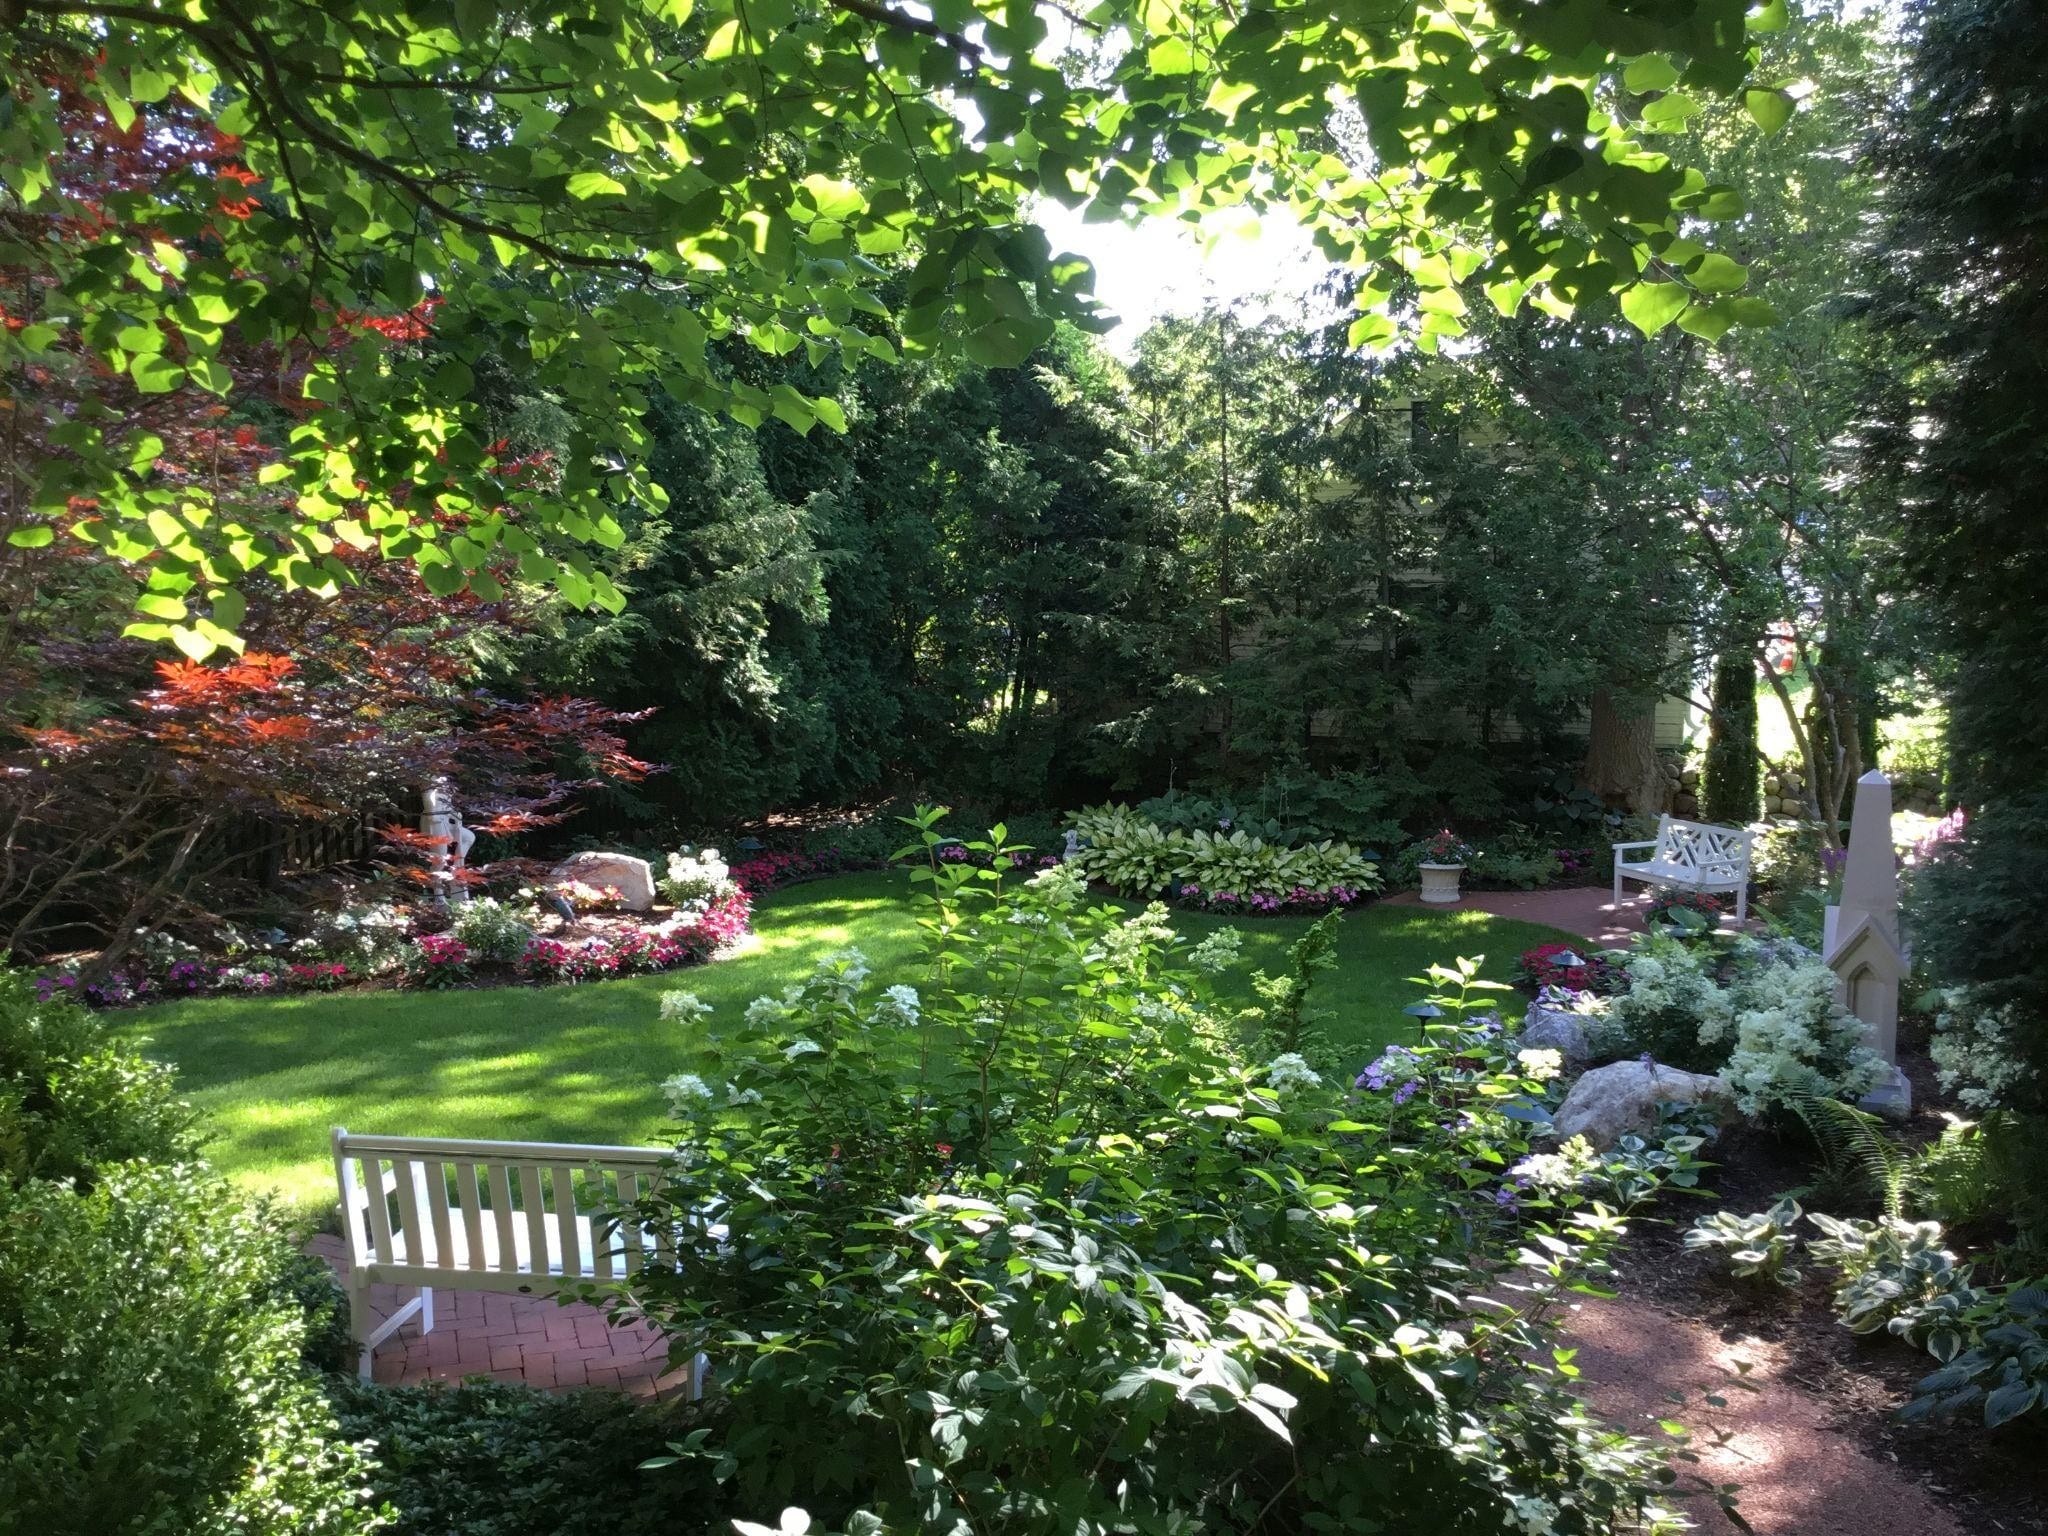
Spiritual Garden Sanctuary - Raised Garden BedsRaised beds warm quickly in spring and offer excellent drainage, which benefits crops that prefer consistent moisture and nutrient-rich soil.
Recommended plants for Wisconsin raised beds include:

  • Leafy greens: lettuce, spinach, Swiss chard, arugula
  • Cool-season herbs: parsley, cilantro, dill, thyme
  • Compact root vegetables: radishes, beets, turnips, green onions
  • Warm-season vegetables (with proper spacing and support): cherry tomatoes, bell peppers, bush beans
  • Fruits: strawberries (especially June-bearing or everbearing varieties suited for the region)

These crops respond well to the loose, amended soil and predictable watering conditions raised beds can provide, especially in early or late parts of the growing season.

Best Plants for In-Ground Gardens

In-ground beds are ideal for larger plants or crops that require more space to spread out or develop deep roots. Wisconsin’s well-drained loam and clay-loam soils work well for many staple crops once properly amended.

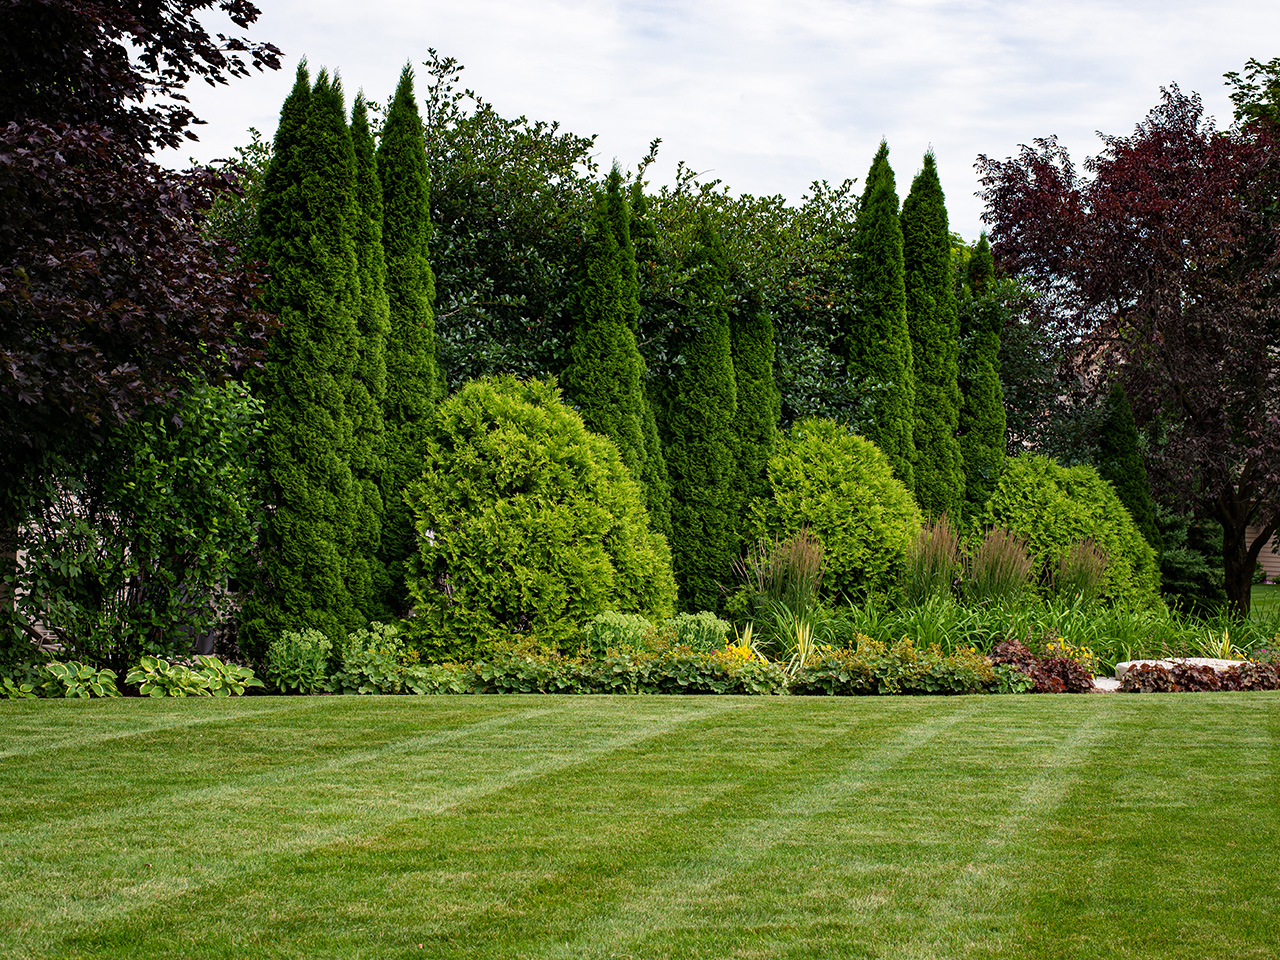
Ornamental grasses for landscaping privacyRecommended plants for Wisconsin in-ground gardens include:
  • Large vegetables: sweet corn, potatoes, pumpkins, squash
  • Sprawling vines: cucumbers, melons (especially Minnesota Midget or other short-season types)
  • Storage crops (crops that store well for weeks/months without losing quality): cabbage, carrots, rutabaga
  • Perennials and ornamentals: rhubarb, asparagus, daylilies, native grasses

These plants benefit from the extra space and deeper rooting potential that in-ground planting allows. Many of them also tolerate the heavier soil types found throughout much of the state.

Choosing the Best Garden Type for Your Landscape

The right garden style depends on your goals, available space, and level of commitment.

Raised beds are well-suited for smaller spaces, modern layouts, and gardeners who want more control over their soil and structure. They’re an excellent choice for intensive planting and easy maintenance.

In-ground gardens are better suited for larger spaces, deep-rooted or sprawling crops, and those who are comfortable with ongoing soil management. They offer flexibility and long-term scalability.

Some homeowners even combine both methods to strike a balance between productivity, aesthetics, and cost.

Choose the Garden That’s Right for Your Needs with Help from American Landscape

Every yard is different, and your garden should reflect that. Whether you prefer the structure of raised beds or the openness of in-ground planting,

Contact us today to schedule a consultation and start building your ideal garden.

Spring Landscaping for Privacy & Security: Best Plants and Design Ideas

Have you ever stepped outside on a sunny spring morning only to feel like you’re on display?

It’s a common feeling—when there’s little space between you and the next door neighbor’s yard. However, privacy doesn’t always mean isolation. Just look at the Elmbrook Historical Society on Pilgrim Road in Brookfield. Despite being nestled right next to a busy road, it feels quiet, tucked away, and peaceful, thanks in large part to thoughtful landscaping.

Many homeowners in Lake Country come to us this time of year wanting that same feeling: more privacy without sacrificing the beauty of their outdoor space.

Whether it’s noisy neighbors, busy roads, or just the need to create a more peaceful space, privacy landscaping has become one of the most rewarding ways to reclaim your yard. And the sense of accomplishment you’ll feel when you step back and see your private oasis is truly satisfying.


Spring is the ideal time to start planting. With the right mix of native trees, shrubs, and perennials, you can create a natural barrier that grows fuller each year—offering visual coverage and a sense of calm. In this guide, we’ll walk you through simple design strategies and the best plants suitable for creating a low-maintenance private outdoor space in Lake Country.

The Benefits of Landscaping for Privacy

Landscaping for privacy goes beyond blocking views—it changes how you experience your outdoor space.

Using plants instead of fences or walls creates a softer, more natural environment that feels peaceful and inviting. A well-designed privacy landscape can give you a quiet place to relax, cut down on noise from the street, and even make your property feel more spacious and secluded.

It also adds serious curb appeal. Layered plantings, seasonal color, and textured foliage create a dynamic look that enhances your home’s style and boosts its value.

Using native plants makes your yard more resilient and eco-friendly, supporting pollinators, birds, and local wildlife.

In short, it’s beauty and function – growing together.

Landscape Design Techniques for Privacy

You don’t need a huge yard or a tall hedge to create privacy—you just need a smart layout and the right plant combinations.

Here are a few go-to techniques we use when designing natural screens:

Layered Planting

Think of this as building a living wall with depth. Start with tall trees or evergreens, add mid-height shrubs, and finish with low-growing plants or ornamental grasses.

Layered plantings for privacy

This layered approach creates a dense, visually interesting screen that feels organic—rather than boxed in.

Smart Placement

Where you plant matters just as much as what you plant.

Focus on key sightlines—between homes, along fence lines, or near patios and decks. A well-placed tree or a row of shrubs can make a huge difference in how open or protected your yard feels.

Natural Sound Barriers

Thick plantings do more than block views—they can also absorb noise.

Broadleaf evergreens, tall grasses, and dense shrubs can help muffle street sounds, neighbor chatter, or even air conditioning units. Mixing textures and plant heights helps disrupt sound while keeping things visually appealing.

Spring Planting Guide: Top Greenery for Natural Privacy

Ready to get planting?

These trees, shrubs, and supporting plants are not only beautiful—they’re perfectly suited for Wisconsin’s climate and make excellent natural privacy screens.

Imagine the beauty these plants will bring to your yard, creating a peaceful retreat that you can enjoy all year round.

Best Native Trees for Privacy Landscaping in Lake Country

Trees are the backbone of any privacy landscape. If you live in an area with a lot of deer, do your research before purchasing plantings. You don’t want to provide a winter buffet for the local herd. These varieties are known for their ability to grow quickly, provide year-round coverage, and thrive in Wisconsin conditions:

  • White Pine – Soft-needled and fast-growing. Great for windbreaks and larger spaces.
  • Black Hills Spruce – Compact and cold-hardy, this spruce offers a full, layered look that works well in smaller yards.
  • ‘Techny’ Arborvitae – Ideal for hedging. Grows upright and thick and holds its shape beautifully.
  • ‘North Pole’ Arborvitae – Tall and narrow—this is perfect for privacy in tighter areas where space is limited.
  • ‘Star Power’ Juniper – Bred locally, this juniper provides dense coverage without getting too tall or wide.

Several deciduous trees, such as crabapples, serviceberry, redbud, hawthorn, and cornus mas, come with multiple stems and low branching, providing screening in the summer months.

5 Shrubs for Privacy Landscaping

Once you’ve established height, shrubs help fill in the middle layer of your design—providing texture, seasonal color, and even food for local wildlife:

  • Gray Dogwood – Fills in fast and spreads into dense thickets. Bonus: it attracts birds.
  • Ninebark – Bold foliage and beautiful bark. Looks great massed together for coverage.
  • Red Twig Dogwood – A stunner in winter with bright red stems; thrives in tricky soils too.
  • Witchhazel – A native that can tolerate shade. Unique late fall flowers provide interest up to snowfall.
  • Privet – If you want a fast-growing wall, this is the plant. It can grow up to 2’+ per year.  It can be tightly pruned to create a formal effect without sacrificing density, and can be kept to whatever height you prefer.

Supporting Privacy Plants: Grasses, Perennials, and Vines That Thrive in Lake Country’s Climate

Supporting plants bring your privacy design together by filling lower spaces, climbing up fences or trellises, and adding movement, color, and pollinator interest:

Native Grasses

Grasses are great for adding height, movement, and subtle structure to your landscape. These native varieties are low-maintenance and tough—perfect for borders, mixed beds, or open privacy screens:

  • Big Bluestem – Tall and swaying, it adds motion and screens at heights up to 8 feet.
  • Switchgrass – Low-maintenance and upright—great for wind and privacy buffers.
  • Indian Grass – Warm-toned and elegant with strong vertical lines.
Ornamental grasses for landscaping privacy

Tall Perennials

Tall perennials can serve as beautiful visual buffers while offering long-lasting blooms and supporting pollinators. Use them in clusters or to add vertical interest throughout your planting beds:

  • Cup Plant – Broad, leafy, and bold—with cheerful yellow blooms.
  • Bee Balm – A fragrant, mid-height filler that blooms for weeks.
  • Iron Weed – A not-often-used native, it is a favorite for butterflies in late summer. The tall purple blooms last through September.

Vines

If you’re working with limited space or want to cover a fence, pergola, or trellis, vines are an excellent way to build vertical privacy fast. These native climbers are vigorous and attractive, making them tough enough for diverse climates:

  • American Hops – Fast-growing, sun-loving, and perfect for vertical privacy.
  • Sweet Autumn Clematis – A vigorous grower that provides massive amounts of tiny, sweet-smelling, creamy white flowers in late summer – fall.

Pro Tip: For the best results, try combining all three—evergreens, shrubs, and perennials. Together, they create a dynamic and layered privacy screen that evolves with the seasons. You’ll get height, color, movement, and full coverage—without having to rely on a single plant type to do all the work.

Start Planting For Spring With Help from American Landscape

With the right plants and a thoughtful design, you can turn your yard into a private, peaceful retreat that feels like an extension of your home. Whether you’re looking to screen off a neighbor’s view, quiet a busy street, or simply carve out a cozy space for yourself, spring is the perfect time to get started.

At American Landscape, we specialize in creating landscapes that are not only beautiful but also functional. Our team can help you choose the right plant combinations, design layered layouts, and install everything with care—so your yard grows better with every season.

Contact us today to schedule a consultation and get expert help tailored to your space and goals.


Tackle Winter Prep with American Landscape

As the last of the autumn leaves settle, many homeowners are tempted to turn their attention indoors, leaving the garden to brave the winter on its own. But imagine stepping into your yard in early spring only to find frostbitten shrubs, withered flowers, and lawn damage from the harsh winter months.

Winter can be rough on landscapes, but with a bit of prep now, you can avoid this springtime heartbreak. Winterizing your landscape is more than just a seasonal chore—it’s an investment in year-round beauty and resilience.

With just a few simple steps, you can protect your plants, keep your lawn and garden healthy, and give your landscape the best chance to thrive through cold weather. American Landscape services makes this process straightforward with expert guidance.

This season, American Landscape can help you prepare your outdoor spaces for the winter ahead so they are vibrant in the Spring.

5 Essential Winter Prep Tips from American Landscape Services

As winter approaches, Wisconsin landscapes face unique challenges—from freezing temperatures and frost to the impact of heavy snowfall and harsh winds. Without proper preparation, these conditions can damage trees, shrubs, and gardens, affecting their growth and health for seasons to come.

Here at American Landscape, our services can help you prepare your landscape for the winter months. Our customized solutions address the specific needs of local plants, trees, and other outdoor features, facilitating a healthy and vibrant landscape in the spring.

Not quite sure where to start? Here are five winter prep tips from the American Landscape team:

Tip 1: Protect Trees and Shrubs for Winter

Winter brings a host of challenges for trees and shrubs, from freezing winds to heavy snow and ice. Without proper protection, these elements can cause frost damage, broken branches, and even harm from hungry animals foraging during the colder months.

To help your trees and shrubs withstand winter’s harshest conditions, consider the following:

Wrap Trees and Shrubs for Winter Protection

Wrapping shrubs and small trees in burlap effectively protects against snow, ice, and cold winds. Burlap acts as a breathable shield that allows moisture and air circulation while keeping harsh winds from directly impacting the plant’s structure. This technique benefits evergreen shrubs or sensitive young trees prone to winter burn.

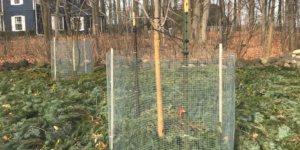
Winter can also attract deer, rabbits, and other animals looking for food, and young tree bark or tender shrubs are often on their menu. Installing wire cages around vulnerable plants creates a physical barrier, deterring these animals from reaching and damaging the plants. Choose rust-resistant wire and place the cage securely around the base to keep animals at bay while allowing the plant to thrive safely through the season.

Placing evergreen boughs over or around shrubs for a natural and effective winter shield offers additional insulation. This method blends seamlessly into the landscape and provides a layer of warmth to help protect plants from frost. Evergreen boughs create a buffer zone that reduces direct exposure to snow and cold air, allowing more delicate shrubs to stay protected without heavy equipment.

Extra Precautions for Winter-Ready Trees and Shrubs

While wrapping and physical barriers help shield your plants from immediate winter threats, additional proactive care can ensure trees and shrubs remain healthy throughout the colder months. By inspecting and preparing them in advance, you can reduce the risk of damage from severe weather and promote a stronger regrowth come spring.

Here are four key practices to consider for well-rounded winter tree care:

  • Health Assessment: Inspect trees for trunk cracks, weak limbs, and discoloration, which could worsen in harsh conditions.
  • Winter Pruning: Trim weak or dying branches to protect trees from breakage under snow or ice.
  • Fertilization: Fertilization before winter is crucial as it strengthens roots and improves resilience against winter stress. Proper nutrition allows plants to endure harsh conditions and promotes healthy growth in the spring.
  • Emergency Removal: Remove hazardous trees or branches post-storm to prevent injury or property damage.

Tip 2: Plant and Store Bulbs Properly

Planting and storing bulbs appropriately before winter can result in a vibrant, early-spring garden. Cold-hardy bulbs can be planted directly in the ground, while tender varieties should be stored for protection against freezing temperatures.

Hardy bulbs like daffodils, tulips, crocuses, and hyacinths are ideal for early planting because they establish strong root systems before the ground freezes, preparing them to withstand winter’s chill.

Planting bulbs 6–8 inches deep creates a protective soil layer, shielding them from frost damage.

Spacing is also crucial; depending on the bulb type, aim for 3–6 inches apart to allow for healthy growth without crowding.

Tip 3: Cut Back Perennials

Deciding whether to cut back your perennials depends on both aesthetic preferences and practical needs. Trimming back perennials helps prevent disease by removing dead or decaying foliage and encouraging fresh spring growth.

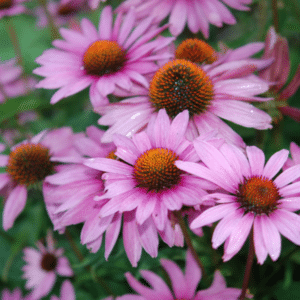
However, some plants can provide winter interest and support for wildlife. Grasses and seed-heavy perennials, like coneflowers, can be left standing to add texture and provide food for birds during winter.

So, who should stay and who should go?

  • Cut Back: Plants like hostas and daylilies benefit from trimming to remove dead leaves and promote healthy growth.
  • Leave Standing: Ornamental grasses, coneflowers, and black-eyed Susans offer visual interest and shelter for wildlife throughout winter.

By balancing both needs, you’ll create a winter landscape that’s both practical and appealing.

Tip 4: Prepare the Lawn and Landscape for Snow Management

Properly preparing your lawn and landscape before the first snowstorm helps prevent long-term damage and keeps your property looking pristine throughout the winter.

Stake and Mark Essential Areas

Before snow hits, use stakes to mark important areas on your property clearly. This ensures snowplows and foot traffic stay clear of delicate plants and structures.

  • Use Stakes for Protection: Place stakes along driveways, walkways, and the edges of your lawn to prevent snowplows from damaging turf or other structures.
  • Guide Foot Traffic: Marking pathways also help direct foot traffic, protecting delicate plants or garden beds from accidental damage by heavy snow accumulation.

Final Mow

While you don’t want to drive or walk on frozen grass if possible, on warmer days you can still get in a final mow and mulch any remaining leaves into your turf. Ensure the grass is not cut too short, which can expose it to winter stress, but aim for a moderate length to protect it from frost damage.

These preparations will ensure your landscape remains intact during winter and recovers quickly when the weather warms.

Tip 5: Water Evergreens to Prevent Winter Burn

Watering your evergreens before the ground freezes is essential to prevent winter burn, which is caused by dehydration in cold weather. Continue watering your evergreens weekly until the soil freezes, ensuring the ground remains moist but not saturated, as overwatering can lead to root rot.

In addition to watering, mulching is an effective way to protect the roots from freezing temperatures. Apply a 2-3 inch layer of mulch around the base of the trees, keeping it away from the trunk to prevent moisture buildup.

Winter burn can be identified by:

  • Browning Needles: Needles turning brown or yellow, especially on evergreens, are a common sign of winter burn.
  • Desiccated Branches: Branches may become dry and brittle, losing flexibility.
  • Curling or Drooping Foliage: Foliage may appear curled or limp due to dehydration.
  • Premature Needle Drop: A sudden loss of needles, especially in evergreen plants, can indicate winter stress.
  • Visible Tips of Branches Turning Brown: The tips of branches or needles may turn brown and dry out due to lack of water during winter.

Proper care now can help your evergreens weather the winter and remain vibrant come spring.

Get Ready for Winter with American Landscape Services

Preparing your landscape for winter ensures a healthier, more vibrant yard come spring, reducing issues like winter burn, plant damage, and lawn stress. A little proactive care now can make all the difference in the long-term health of your plants.


For tailored advice or assistance with winterizing your outdoor space, contact American Landscape. Our services are designed to help you protect and enhance your landscape through the colder months.

Fall Landscaping Checklist

Fall isn’t just about pumpkin lattes and cozy sweaters; it’s the pivotal time to prep your landscape for the colder months ahead and set the stage for a lush spring comeback. From tending to fallen leaves to planting springtime bulbs, the change in season offers a delightful array of landscaping tasks that not only enhance the beauty of our outdoor spaces but also promise a bountiful resurgence come spring. We’re highlighting the essential fall landscaping chores that everyone should have on their checklist.

Flowers

  • Dividing Perennials
    Divide & transplant perennials (while ground temperatures are still warm). Cut the tops and stems down to a few inches above the crown at the base of each plant. Once you’re done, make sure you rake the beds and dispose of dead plant material so your garden still looks fresh during the winter months.

Note: leaving a few inches of plant material and mulching above the crown is better for the plants. If any critters decide to nibble over the winter, they’ll eat the few inches above the crown instead of eating the crown and killing the plant.

  • Plant fall bulbs (before the ground freezes). When you plant your bulbs, unless the label says differently, plant the bigger bulbs 8” deep and the smaller bulbs at 5”. Place the bulb in the hole with the roots facing down. Once planted, cover the hole with soil but don’t pack it. Water it once.

RELATED: How to Plant Fall Bulbs

  • Clear leaves from flower beds
  • Treat perennial weeds with herbicide. Spray perennial weeds (bindweed, creeping Jenny, clover, etc.) before the first freeze to allow the weeds to take in the herbicide and prevent a weedy garden in spring.

Lawn

  • Aerate your lawn – fall is the best time
  • Fertilize your lawn. Apply now to ensure it looks its best come warmer weather.
  • Clear leaves from lawn. Mulching the leaves helps return nutrients to the soil. If that’s not an option for you, raking the leaves and keeping your lawn clear of debris can prevent your lawn from being smothered and stunting new grass growth.

RELATED: Comprehensive Lawn Care

Trees/Shrubs

  • Protect Trees and Shrubs
    Continue watering trees and shrubs until first frost
  • Protect your trees & shrubs. Wrap trees up to the lower branches using hardware cloth or tree wrap to prevent damage from deer rubbing. Cage small trees and shrubs in hardware cloth to prevent rabbit/rodent damage. Be sure to bury the cloth 2-3” beneath the surface.
  • Do NOT prune evergreens until spring
  • Remove leaves from under diseased plants and trees. If your tree/shrub had a disease issue, such as apple scab, powdery mildew, tar spot, etc., disposing of the diseased leaves will help prevent a recurrence next year.

Note: Do not compost diseased leaves.

  • Prevention is best, so consider getting on a spray program
  • Fertilize your trees and shrubs. Fertilizing in fall encourages root growth by restoring nutrients to the soil and allows for lush, healthy growth and flowering the following season.

If the list above feels daunting, feel free to reach out and schedule fall clean up services from the pros at American Landscape.


Want to stay in the loop?
Sign up for our newsletter.

"*" indicates required fields

Name*
This field is for validation purposes and should be left unchanged.

American Landscape - 50 Years of Outstanding Landscaping Service to the Greater Milwaukee Area

(262)252-4260
info@amerlandscape.com

N60 W16073 Kohler Ln,
Menomonee Falls, WI 53051